Home How-To Recipes |
|
Flax Seed Hair Gel
|
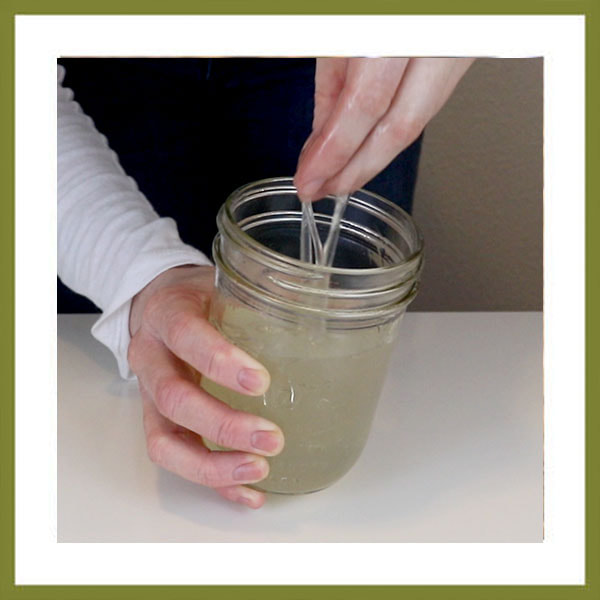
Flax Seed Hair Gel
Ingredients ✣ Flax seeds – ¼ cup ✣ Water – 2 cups ✣ Vitamin E oil – 1 tsp. Materials ✣ Cheesecloth or Stocking ✣ Glass Jar ✣ Tongs ✣ Cooking Pot Directions 1. Put water and flax seeds into a pot and bring to a boil, continuously stirring to prevent flax seeds from sticking to the pot. 2. Once a rolling boil is achieved, reduce heat to medium or low heat. Higher heat will result in thicker gel consistency. 3. Simmer for up to 10 minutes or until gel reaches your desired consistency. Gel will form a thin film on top when it is ready. 4. Using cheesecloth/stocking, strain gel into storage jar/container. Use tongs to squeeze out extra gel, being careful to not burn yourself. 5. Refrigerate flax seeds to preserve and reuse to make up to 3 batches of gel, or save them to add to smoothies or other recipes. 6. Once gel has cooled to room temperature, stir in vitamin E oil. 7. Gel will last up to 3 weeks refrigerated. To Use Use as you would any other hair gel for naturally styled hair. Click here to access instructional video. |
|
Face Moisturizer
|
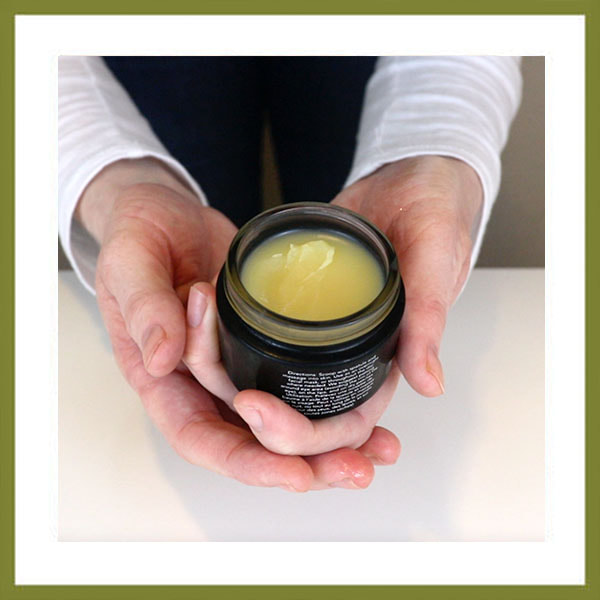
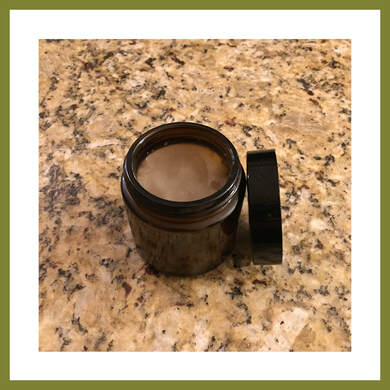
Face Moisturizer
Ingredients ✣ Shea butter – 2 Tbsp. ✣ Any face oil (i.e. jojoba, grapeseed, etc.) – 1 Tbsp. ✣ Vitamin E oil – 1 tsp. Materials ✣ Cooking Pot ✣ Metal Bowl ✣ Small Glass Container Directions 1. Create a double boiler by first boiling water in a pot. Next, add shea butter to a metal heat-safe bowl and place on top of pot of boiling water. Allow shea butter to melt in the bowl while water continues to boil. 2. Once melted, carefully remove bowl from heat and allow to cool for about 15 minutes. 3. Once cooled, add in face oil of choice and vitamin E oil. 4. Pour mixture into glass container and stir until all ingredients look blended. 5. Allow mixture to cool until settled. To Use Use about a dime size amount of moisturizer in the morning and evening for healthy, naturally moisturized skin. Click here to access instructional video. |
|
BUG REPELLENT
|
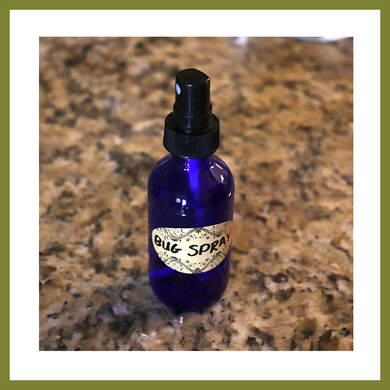
Bug Repellent
Ingredients ✣ Apple cider vinegar – ½ cup ✣ Witch hazel – ½ cup ✣ Essential oils (eucalyptus, lemongrass, citronella, tea tree or rosemary) – 40 drops total Materials ✣ 8 ounce glass spray bottle Directions 1. Mix together witch hazel, apple cider vinegar and essential oils in the 8 ounce glass spray bottle. To Use Spray over the body, avoiding repellent in eyes and mouth. If using a citrus essential oil, avoid sunlight. Use caution if you have sensitive skin and stop use if irritation occurs. |
|
Toothpaste
|
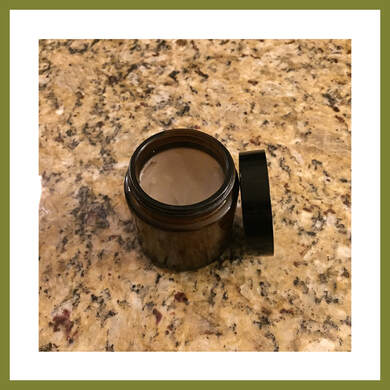
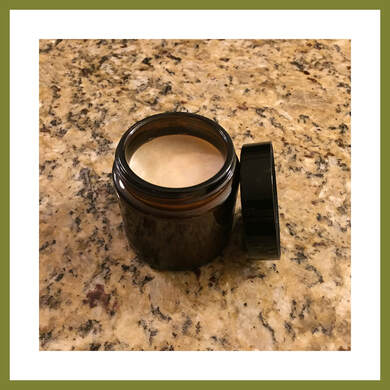
Toothpaste
Ingredients ✣ Organic coconut oil – 2 Tbsp. ✣ Baking soda – 1 Tbsp. ✣ Organic peppermint essential oil – 20 drops Materials ✣ Small Glass Jar Directions This one’s easy – 1. Stir together the coconut oil, baking soda and essential oil in the glass jar! To Use Scoop out a small amount with a spoon onto your toothbrush. If the taste really bothers you, you can add a small amount of xylitol to sweeten it up. Coconut oil melts around 76 degrees F, so the texture might change accordingly. If your toothpaste melts, you can put it in the freezer, and if it’s completely solid, hold it under warm running water. Use caution if you have sensitive teeth and gums, and stop use if irritation occurs. |
|
DEODORANT
|
Deodorant
Ingredients ✣ Raw shea butter – 3 Tbsp. ✣ Arrowroot powder – 3 Tbsp. ✣ Organic coconut oil – 2 Tbsp. ✣ Baking soda – 2 Tbsp. ✣ Essential oils Materials ✣ Small Glass Jar Directions 1. Add the coconut oil and shea butter to a glass jar. Set glass jar in a pan of boiling water until the two ingredients melt together. 2. Remove from heat and add in the arrowroot powder, baking soda, and essential oils (use as much or as little as you like). We have used tea tree and lavender for the essential oil component of the deodorant due to their anti-microbial properties, but you can use any essential oils that you like. 3. Stir, and pour into a smaller glass container. Set aside to cool and solidify. To Use Scoop a pea-sized amount and apply under each arm. If this is your first time using aluminum-free deodorant, your body may take time to detox built up chemicals from years of standard deodorant. But don’t worry, it’s totally worth it! After a short while, you will end up smelling even better. Original recipe appears on Six Figures Under Use caution if you have sensitive skin and stop use if irritation occurs. |
|
dish soap
|
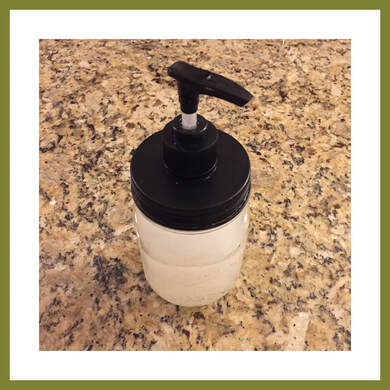
Dish Soap
Ingredients ✣ Castile bar soap – ¼ cup grated (tightly packed) ✣ Liquid castile soap – ¼ cup ✣ Boiling water – 1 ¼ cups ✣ Washing soda – 1 Tbsp. ✣ Essential oils (optional) Materials ✣ Refillable Soap Dispenser Directions 1. Stir grated castile soap into boiling water until dissolved. 2. Continue stirring mixture while adding washing soda. 3. Next, stir while adding liquid castile soap. 4. After the mixture cools, add essential oils and store in a refillable soap dispenser. If the mixture is too thick, add a small amount of warm water accordingly. To Use Use as standard dish soap. Original recipe appears on Nature's Nurture Use caution if you have sensitive skin. Try wearing gloves and stop use if irritation occurs. |
|
VINEGAR HOUSEHOLD CLEANER
|
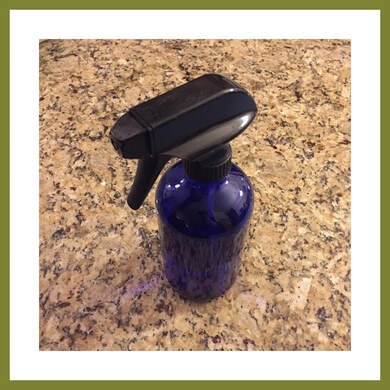
Vinegar Household Cleaner
Ingredients ✣ Distilled water – 1 cup ✣ White distilled vinegar – 1 cup ✣ Essential oils (optional) – 15 drops Materials ✣ Refillable Spray Bottle Directions 1. Pour all ingredients into a spray bottle (use a glass spray bottle if using citrus essential oils). 2. Gently shake and store at room temperature. To Use Use as you would any multi-purpose cleaner. *Do not use on marble or granite since it has been known to etch away at the stone. |
|
SHAMPOO
|
Shampoo
Ingredients ✣ Pure liquid castile soap - 1 cup ✣ Brewed green tea - 1 cup ✣ Organic olive oil - 1 Tbsp. ✣ Organic raw honey - 1 Tbsp. ✣ Essential oils (optional) - 20 drops Materials ✣ Glass Jar Directions 1. Brew the green tea for 30 minutes 2. Add all ingredients together in a bowl and stir. 3. After the ingredients are mixed together, pour into a mason jar or other sealed container. To Use Wet hair, pour out one to two tablespoons of shampoo in hands and lather into scalp and hair. Rinse out with cool water. Cedarwood, lavender, and rosemary essential oils work best for volumizing. Lemon, lavender and peppermint essential oils are best for a dry itchy scalp. Tea tree oil works well to keep the bugs away. Original recipe appears on lifesanity.com Use caution if you have sensitive skin and stop use if irritation occurs. |
|
FaCE WASH
|
Face Wash
Ingredients ✣ Coconut oil - 1 cup ✣ Baking soda - 1 Tbsp. ✣ Lavender essential oil - 5 drops ✣ (For dry & some combination skin) Frankincense essential oil and Lemon essential oil - 5 drops each oil ✣ (For acne prone skin) Tea tree essential oil - 10 drops Materials ✣ Small Glass Jar Directions 1. Melt the coconut oil in a pan over low heat or using the double boiler method. 2. Remove from heat once melted and mix in remaining ingredients. 3. Keep in an air tight glass jar and store in a cool place. To Use Scoop out about a pea-sized amount with hands and massage into face. Rinse off with warm water and gently pat face dry with a towel. Original recipe appears on draxe.com Use caution if you have sensitive skin and stop use if irritation occurs. |
|
Mouthwash
|
Mouthwash
Ingredients ✣ Baking soda - 2 tsp. ✣ Filtered or distilled water - 1/2 cup ✣ Tea tree essential oil - 2 drops ✣ Peppermint essential oil - 2 drops Materials ✣ Glass jar Directions 1. Fill the glass jar (we use a mason jar) with ingredients. 2. Shake before each use to distribute essential oil and baking soda. 3. It is best to make small batches to prevent changes in flavor and effectiveness. To Use Swish about 2-3 teaspoons of the mouthwash in mouth for one to two minutes. Original recipe appears on diynatural.com Use caution if you have sensitive teeth and gums, and stop use if irritation occurs. |
|
Sustainable Project Tutorials
DIY SELF-WATERING PLANTER
|
DIY Self Watering Planter
Materials ✣ Water cooler (ask local businesses if they have one you can recycle) ✣ Drill ✣ Self-watering potting soil mix Instructions 1. Drill holes around entire sloping top (around the spout) about 2 inches apart from each other. 2. Cut the bottle into two pieces. The bottom piece should be about 10 inches tall (enough for the spout to touch the bottom piece when flipped upside down). 3. Drill a hole toward the top of the bottom piece (for drainage). 4. Flip over the top piece of the bottle and fill it with soil and plant (note: add tomato cage prior to planting if needed). 5. Cover the outside of the bottom piece with paint or duct tape to prevent algae growth from the sunlight. 6. Water soil accordingly, and the bottom piece will act as a water reservoir. Image retrieved from bucolicbushwick.com |

|
DIY MASON JAR PLANTER
|
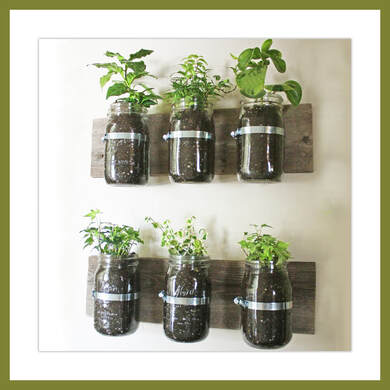
DIY Mason Jar Planter
Materials ✣ Quart Mason Jars ✣ Heavy duty all stainless hose clamp (get one clamp for each jar) ✣ Boards ✣ Potting Soil ✣ Rocks or gravel ✣ Nails and screws Instructions 1. Attach clamps to the board using preferred method. 2. Mount the board on the wall if planter will be hanging up. 3. Add rocks to bottom of jars and some potting soil. 4. Then add the plant and more soil. 5. Place jar in clamp and tighten. Image retrieved from notjustahouswife.com |
|
GROW FOOD FROM SCRAPS
|
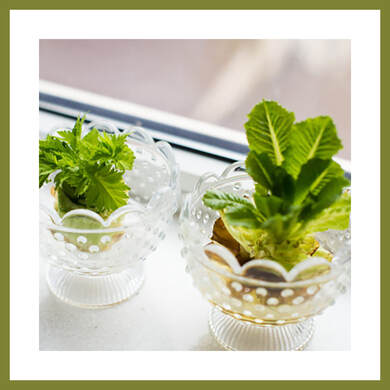
Grow Food from Scraps
Lettuce & Celery 1. Place about an inch of the lettuce or celery base in a bowl with a bit of water in it and place in a sunny spot. 2. Be sure to mist lettuce leaves once in a while. 3. When roots and leaves begin to appear, after 3-4 days, transplant the lettuce or celery to a pot with soil. Avocado 1. Wash an avocado pit and stick two toothpicks through the middle of it, one on each side, to suspend over a bowl or jar of water that covers the bottom inch of the seed. 2. Place the bowl or jar in a warm place, but out of direct sunlight, and maintain the water level. 3. A stem and roots will appear in about six weeks. 4. When the stem reaches 6 inches, cut it down to 3 inches. 5. When you see leaves, transplant your avocado to soil, leaving about half of the seed above ground. Image retrieved from tasteofhome.com |
|
DIY THREE-BIN COMPOST SYSTEM
|
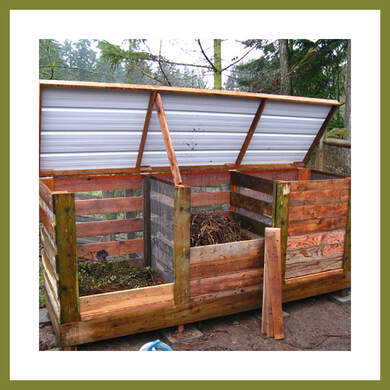
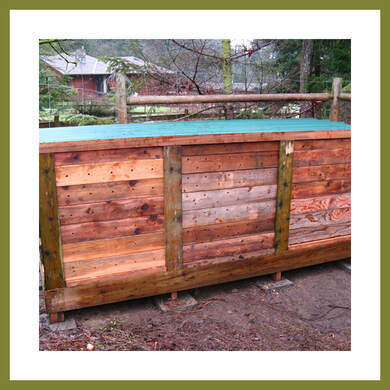
DIY Three-Bin Compost System
Materials and Use ✣ Dividers and base - top & lid rails: 12-foot cedar 2x4 ✣ Dividers and bin construction - 16d galvanized nails (3-1/2") ✣ Front slats - 8-foot cedar 1x6 ✣ Front runners - 6-foot 1x4 lumber | center runners - 6-foot 1x6 lumber| | back runners - 6-foot 1x2 lumber ✣ Lid - 10-foot 2x2 lumber, 6-foot 2x2 lumber, 3" zinc plated hinges, flat 4 corner braces with screws, Flat 3" T-braces with screws ✣ Lid construction - 8d galvanized casing or finish nails (2-1/2") ✣ Lid cover - clear corrugated fiberglass panels, horizontal closure strips (or wiggle molding) ✣ Attaching corrugated fiberglass roofing - Gasketed aluminum nails ✣ Attaching hardware cloth to dividers and bin - Poultry net staples or 1" galvanized staples ✣ Attaching base and top boards to dividers - 1/2" carriage bolts 4" long, washers for bolts, nuts for bolts Instructions 1. Cut 2x4s 2. Build dividers 3. Attach hardware cloth to dividers 4. Set up dividers and build bin 5. Attach runners and front slats 6. Build and attach fiberglass lid View entire plan and instructions here | Image retrieved from Backyard Feast |
|
HOW TO SOAK & SPROUT NUTS, SEEDS, GRAINS & BEANS
|
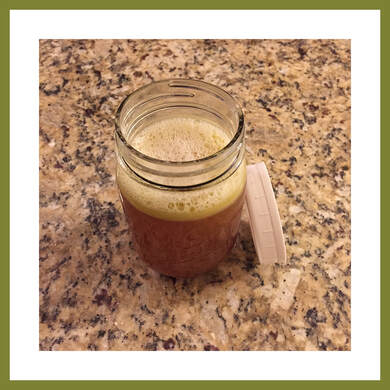
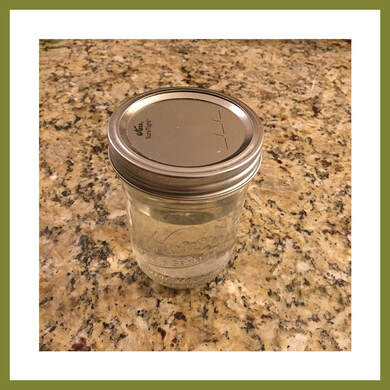
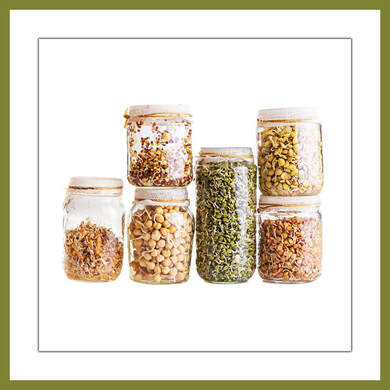
How to Soak & Sprout Nuts, Seeds, Grains, & Beans
Materials ✣ Nuts, seeds, grains, or beans ✣ Glass jar (optional glass bowl) ✣ Cheese cloth & rubber band or sprouting screen ✣ Celtic sea salt (optional) Instructions 1. Place nuts, seeds, grains, or beans in the large glass bowl or mason jar and cover with warm, filtered water (about 1:2 ratio) and about 1/2 tsp. of Celtic sea salt. Cover with cheesecloth and set aside. Soaking times can be found here. 2. Drain and rinse about every 8 hours (if soaking that long). Food soaking times can be found here. 3. Invert the jar at an angle to ensure that excess water drains and air can circulate (you can purchase stands for the jars or simply prop up against a surface. 4. Rinse a few times a day while sprouting. Food sprouting times can be found here. 5. In 1-4 days you will see sprouts of about 1/8-inch to 2-inches long. 6. When ready to eat, rinse sprouts well, drain, and store in sealed jar in refrigerator. Eat within 2 to 3 days. Image and sprouting times appear on vegetariantimes.com |
|
DIY Low Flow Shower Head
|
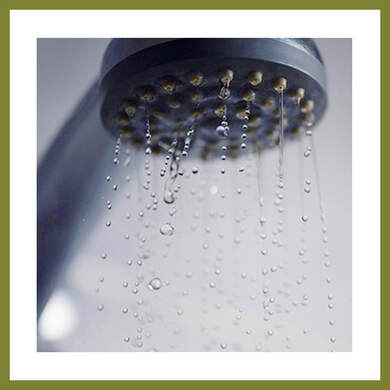
DIY Low Flow Shower Head
Materials ✣ Your standard shower head ✣ Crescent wrench (to unfasten and refasten shower head) ✣ Rubber washer without a hole in the middle that is a diameter similar to that of the pipe connecting to the nozzle ✣ Shears (also known as snips) Instructions 1. Remove the shower head from the waterline using the crescent wrench or your tool of choice. 2. Using the shears, cut little wedges around the edge of the rubber washer starting from the outside and stopping before reaching the center. 3. Insert the now cut up washer into the shower head as far as possible, and refasten the shower head to the waterline. If the flow is too restricted, cut closer to the center of the washer. If it is not restricted enough, begin again with a new washer, and be sure to cut smaller slits. This cost-effective technique will reduce your flow by about 75%. Image retrieved from VNExpress |
|
